How to Set a Walk the Plank Mouse Trap
Setting the walk the plank mouse trap is easy! Let’s jump right in.
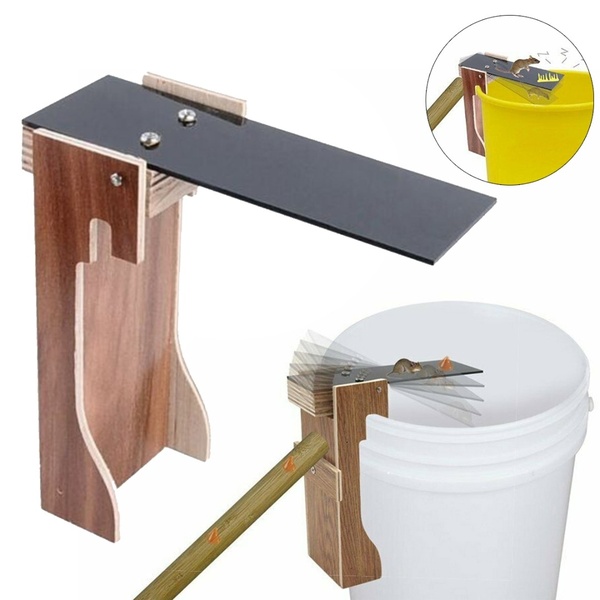
- Open your mouse trap. Look it over, you will notice that there is a set screw and magnet underneath the back base of the trap. This will be important for later if your trap fails to catch mice. You shouldn’t have to mess with this initially.
- Make sure you have a 5 gallon bucket and a ramp that will lead to the trap. The ramp can be just a piece of wood.
- For a live trap put about a 1/2 inch of water in the bucket. For a kill trap put 4-5 inches.
- The best bait is going to be peanut butter. Get some and smear it on the end of the trap liberally. It is also smart to smear little bits on the ramp leading up to the trap as well. The mice will eat that quickly and then will be lead to the trap.
- Hang the trap on the edge of the bucket so that the plank drops into the water.
- Place the ramp up to the trap. NOTE: it is definitely best to have the ramp leading to the back of the trap. If it is leading to the side of the trap and on the edge of the bucket the mice may be able to use the ramp and steal food off the plank without tripping it.
- Make sure you have the trap set up in the optimal area and check it the next day.
- TROUBLESHOOTING: If you notice the bait being eaten but no mice are caught there are usually only 4 things that could be wrong.
- The plank is set up on the side of the trap and they are using it to secure themselves and steal bait.
- If you have it set as a live trap with no water they might be jumping out.
- If the magnet and set screw are set wrong the smaller mice may not trigger the release. Try adjusting the set screw to make the trap more sensitive.
- It might be rats that are taking the bait. If this is the case you need the Walk the Plank Rat Trap.
